
Kronos Staffing Dashboard
Are you using Kronos Dimensions' Advanced Scheduling to its fullest capacity?
Many of my clients using advanced scheduling often express the need to have a tool as powerful as the Scheduler, but more user-friendly. They want to allow their supervisors to consult their entire team or department at a glance. They also want to allow their supervisors to make changes more quickly:
- Cover an open shift with a drag and drop or with the call list
- Indicate a last minute absence
- Change the start or end time of a shift
- Transfer
- Evaluate coverage
Although the Kronos Dimensions' Advanced Scheduling covers all these points, the Staffing Dashboard is a new tool introduced in Release 6. It has the same basic functions but allows for better day-to-day micromanagement of the team.
Built like a dashboard, it is visually more attractive and easy to use, allowing for faster adoption of the tool avoiding the low resistance to change often seen among management employees.
How to configure Staffing Dashboard and what are the options?
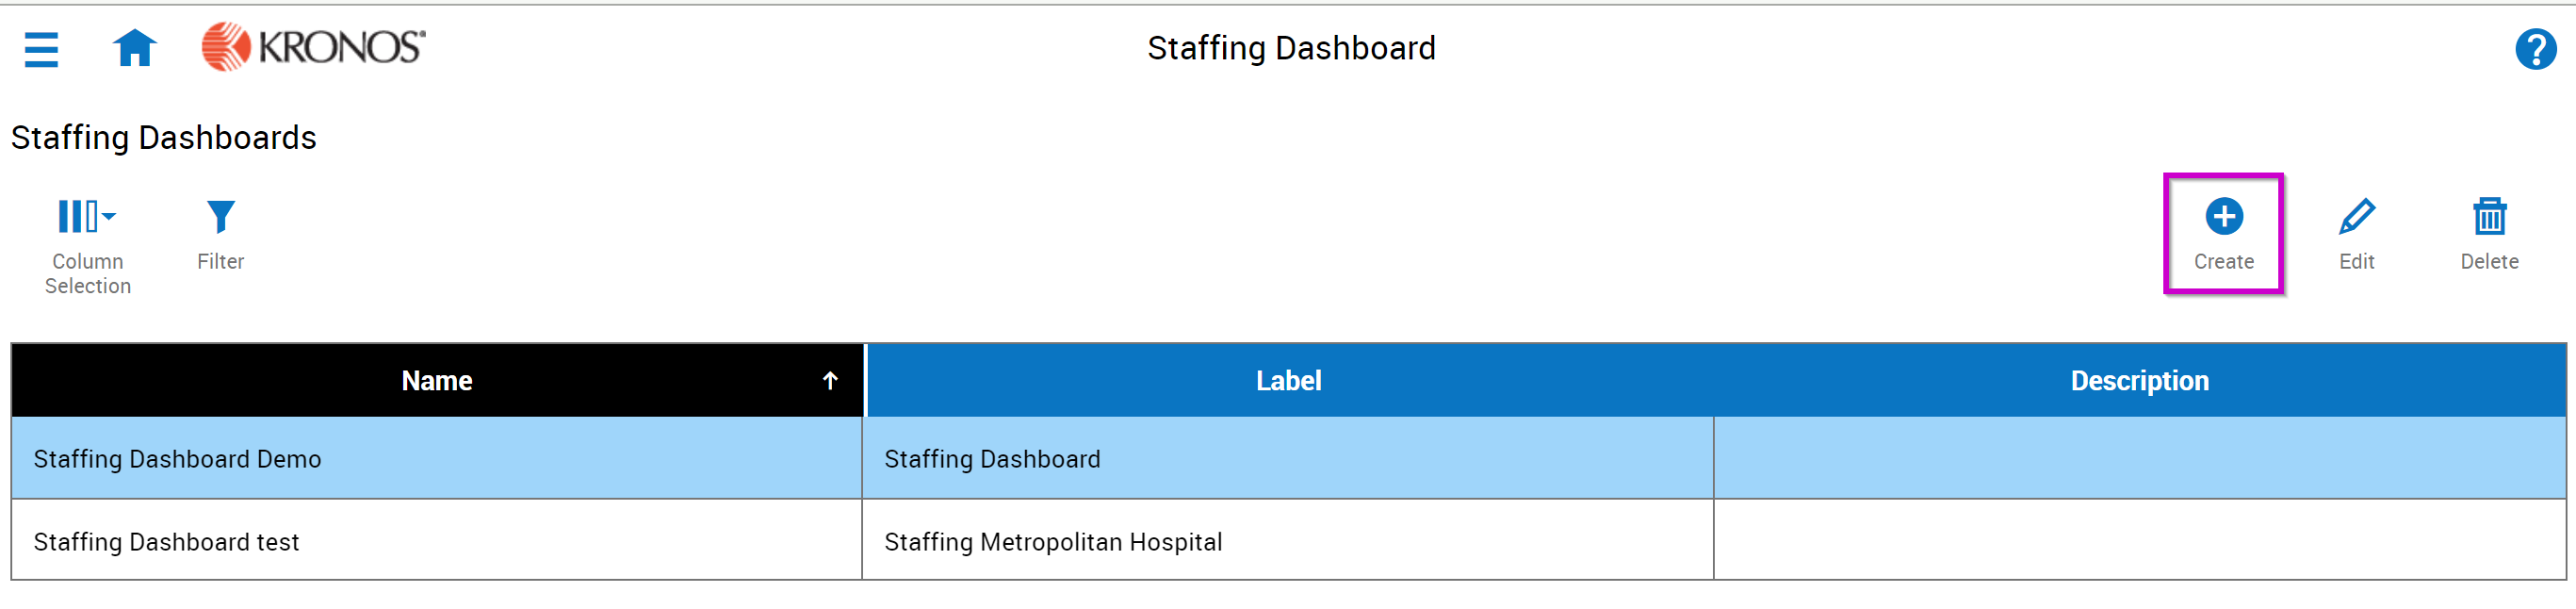
There are three simple steps to configuration. To begin, go to Administration --> Application Setup --> Staffing Setup. Click Staffing Dashboard.
1. Staffing Dashboard
Click Create:
Complete the following information and save when finished:
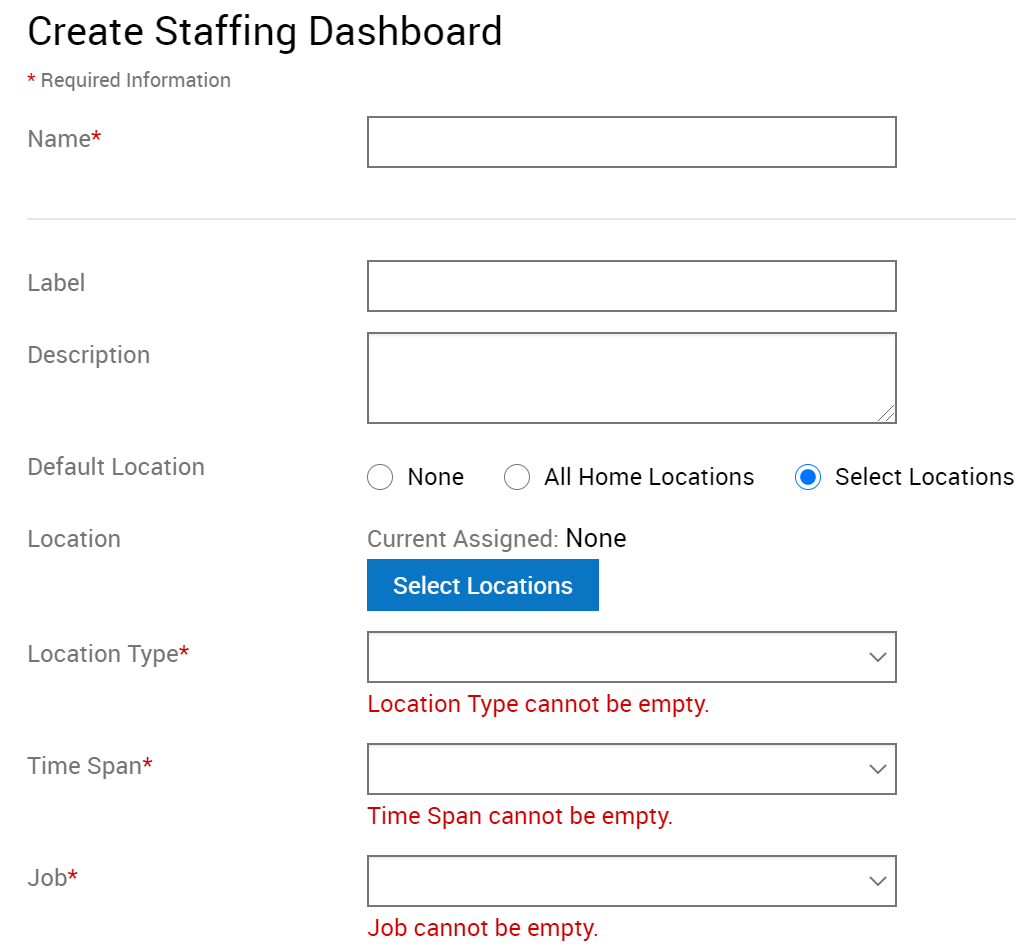


Name: Write the proper name of the configuration
Label: Enter display name
Description: Write a description that helps to know what has been configured or who the tool is for
Default Location: Choose or not a default location depending on which person in your company you want to assign the tool to. For example, you can choose Department A for the supervisor responsible for that department. Take into account that this person's own security will apply and that he or she will only be able to see the persons determined in his or her Transfer Job Group by the Manager job Transfer set. If he or she has access, the person will also be able to change location. This is only a default view.
Location Type: Select the location type to which the Jobs you wish to view are assigned. Often, this is the last location type found in our organization chart. If you wish to view multiple location types, simply create multiple Staffing Dashboards.
Time Span: You can choose whether you want to see the whole day by default or only certain quarters in particular. For example, if your Supervisor A is in charge of the team starting at 7am and finishing at 4pm he can have this time span as default. Once in the tool, he will be able to change this selection as needed.
Job: It is possible to choose a default job or see all the jobs attached to the location. The user will be able to change the selection as needed, depending on his security profile.
Staffing indicatior Type display: Several indicators can be assigned to the profile, such as: Comments and Notes, Employee Rule Violations (Pool), Employee Rule Violations (Unit), Location Rule Violations, Locks, Tags, Transfers
Rules and Location Rules: As in the Schedule planner it will be possible to select which Rules Violations will be visible in the tool.
Display Coverage Values : It is possible to display data corresponding to the coverage and thus easily see whether too many or too few employees are planned for the day.
It is also possible to exclude pay codes, view employee photos and several other options.
 For more details do not hesitate to consult the help button at the top of the screen in order to understand the details of each selection.
2. Staffing Profiles
Once the Dashboard is configured, create a profile in Administration --> Application Setup --> Display Preferences --> Staffing Profile and click Create:

Then simply name the profile, select the Dashboards you wish to use and click Assign.

3. Display Profile
Finally, it will be necessary to assign the profile in Administration --> Application Setup --> Display Preferences --> Display Profile to the appropriate manager's profile.
Once this step is completed, do not forget to validate that the employee has the correct Display Profile attached to his Personal Information.
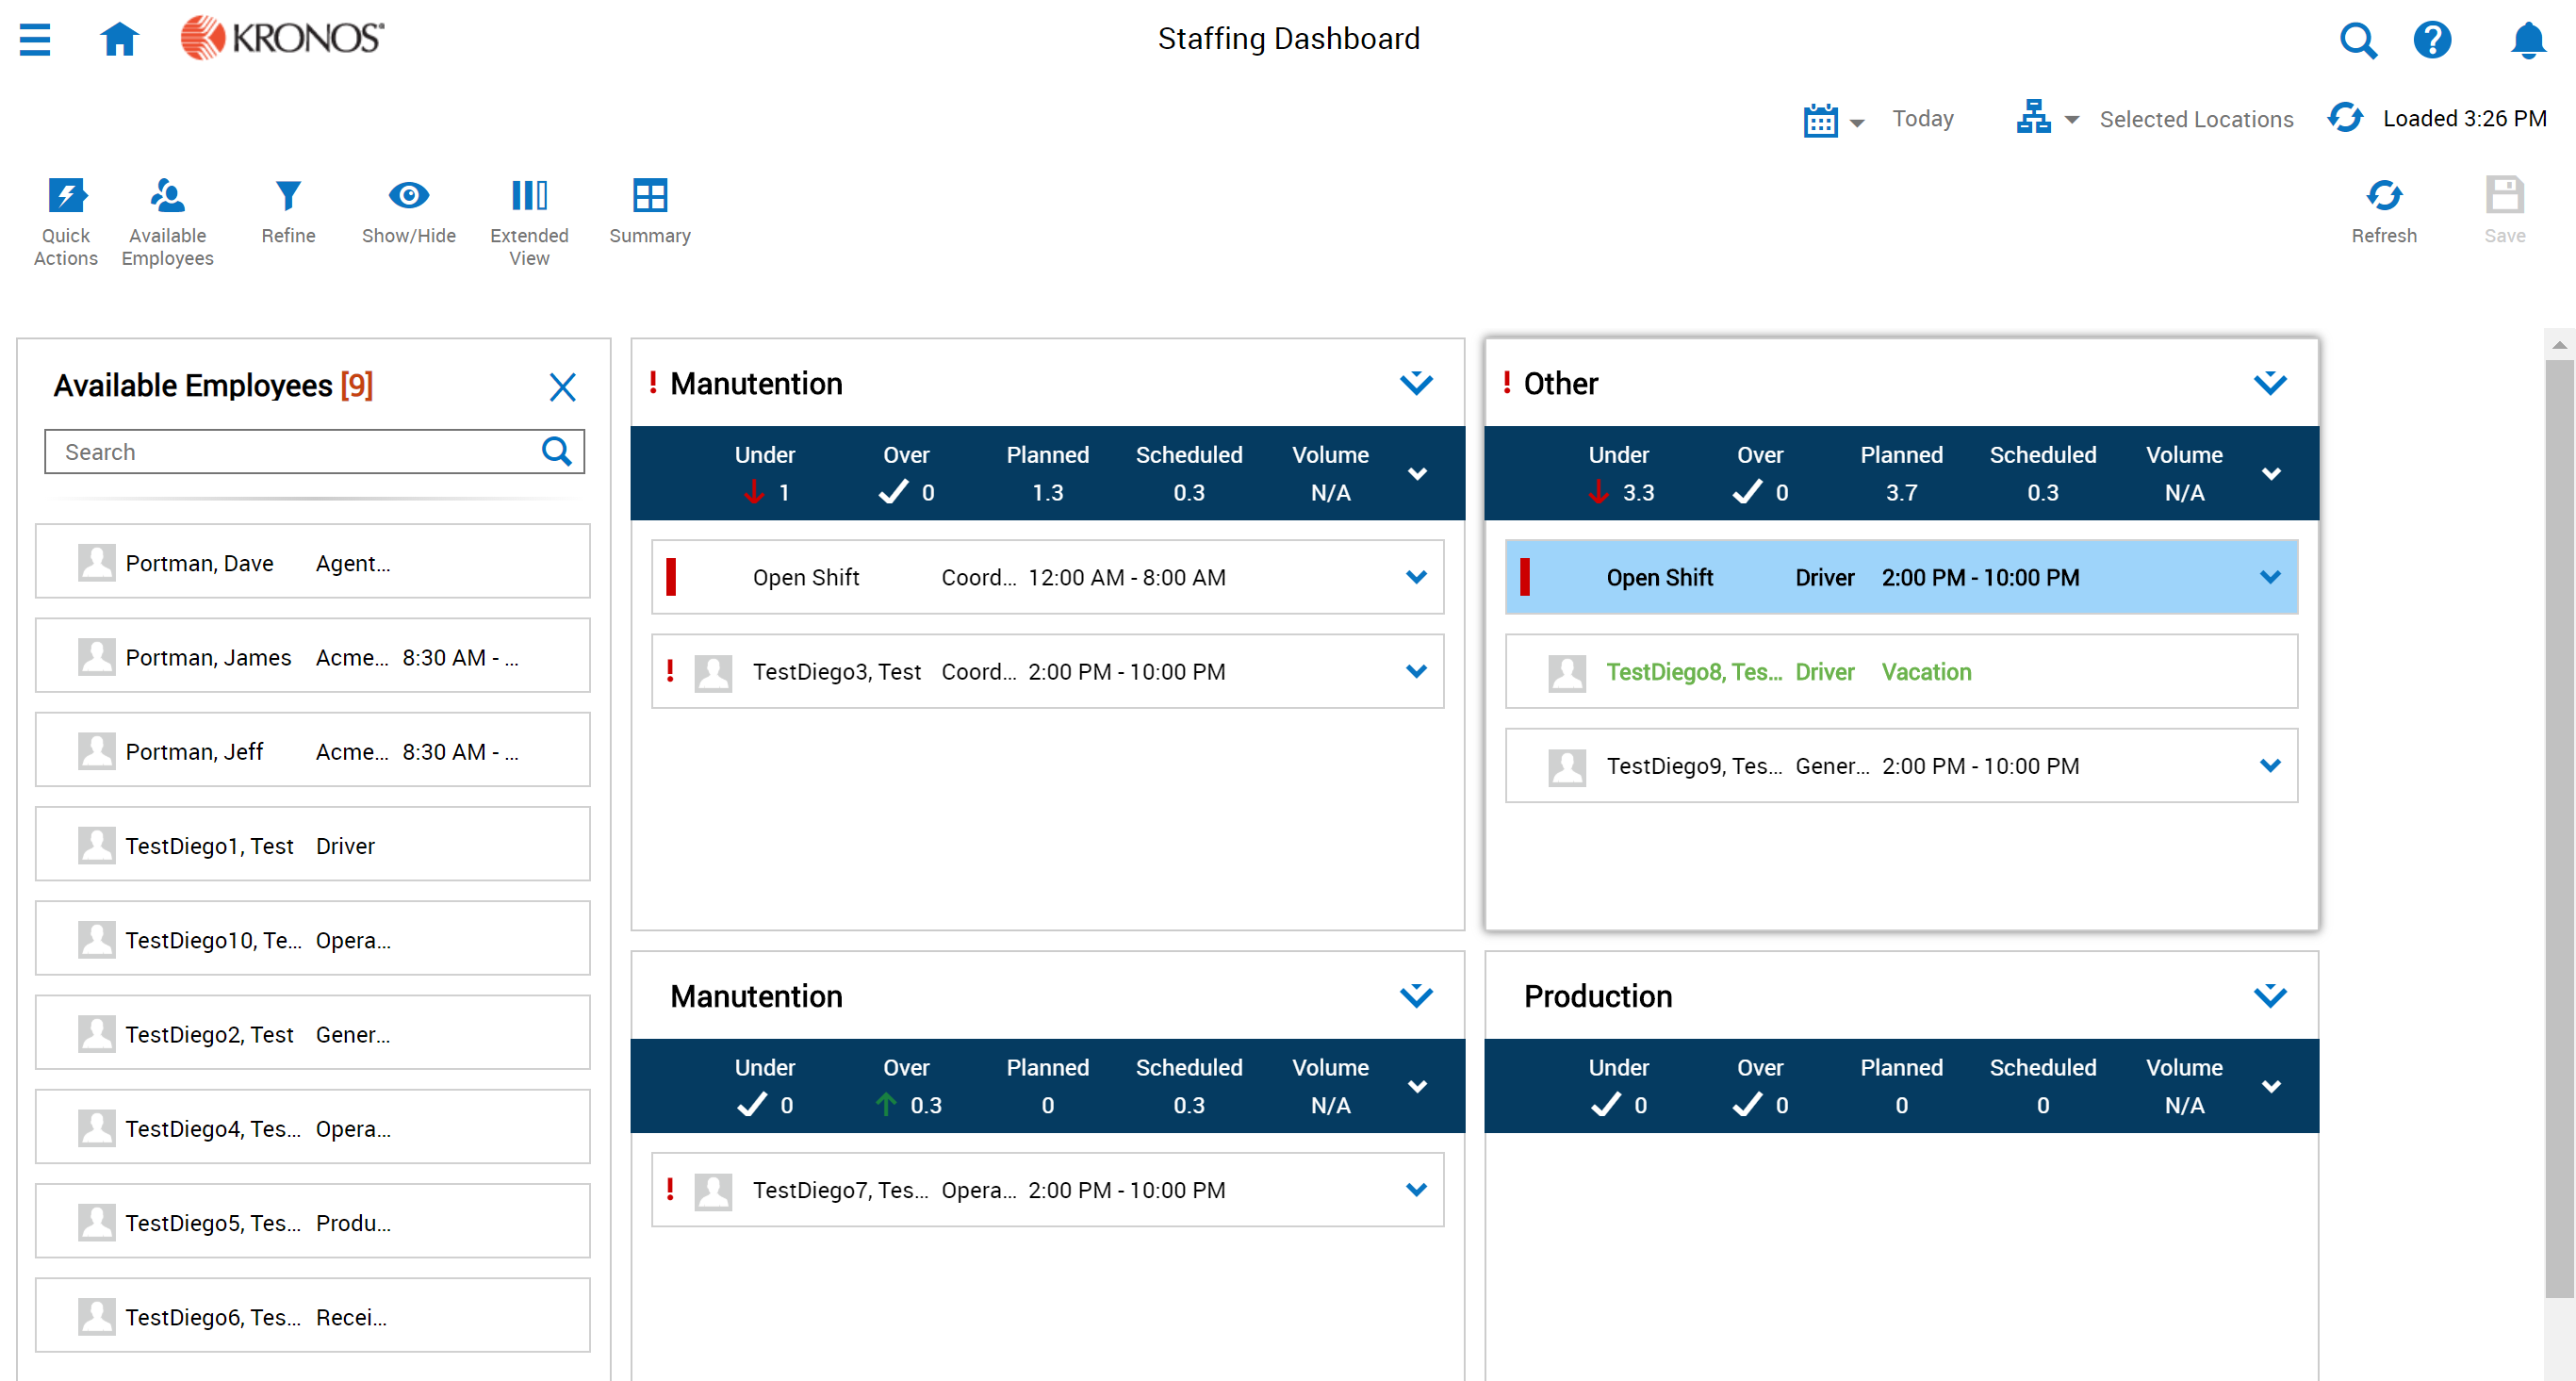
How to use Kronos Staffing Dashboard?
Once the tool has been configured and assigned to the right profile, you can find it under the Schedule section. It will have the name you gave it.
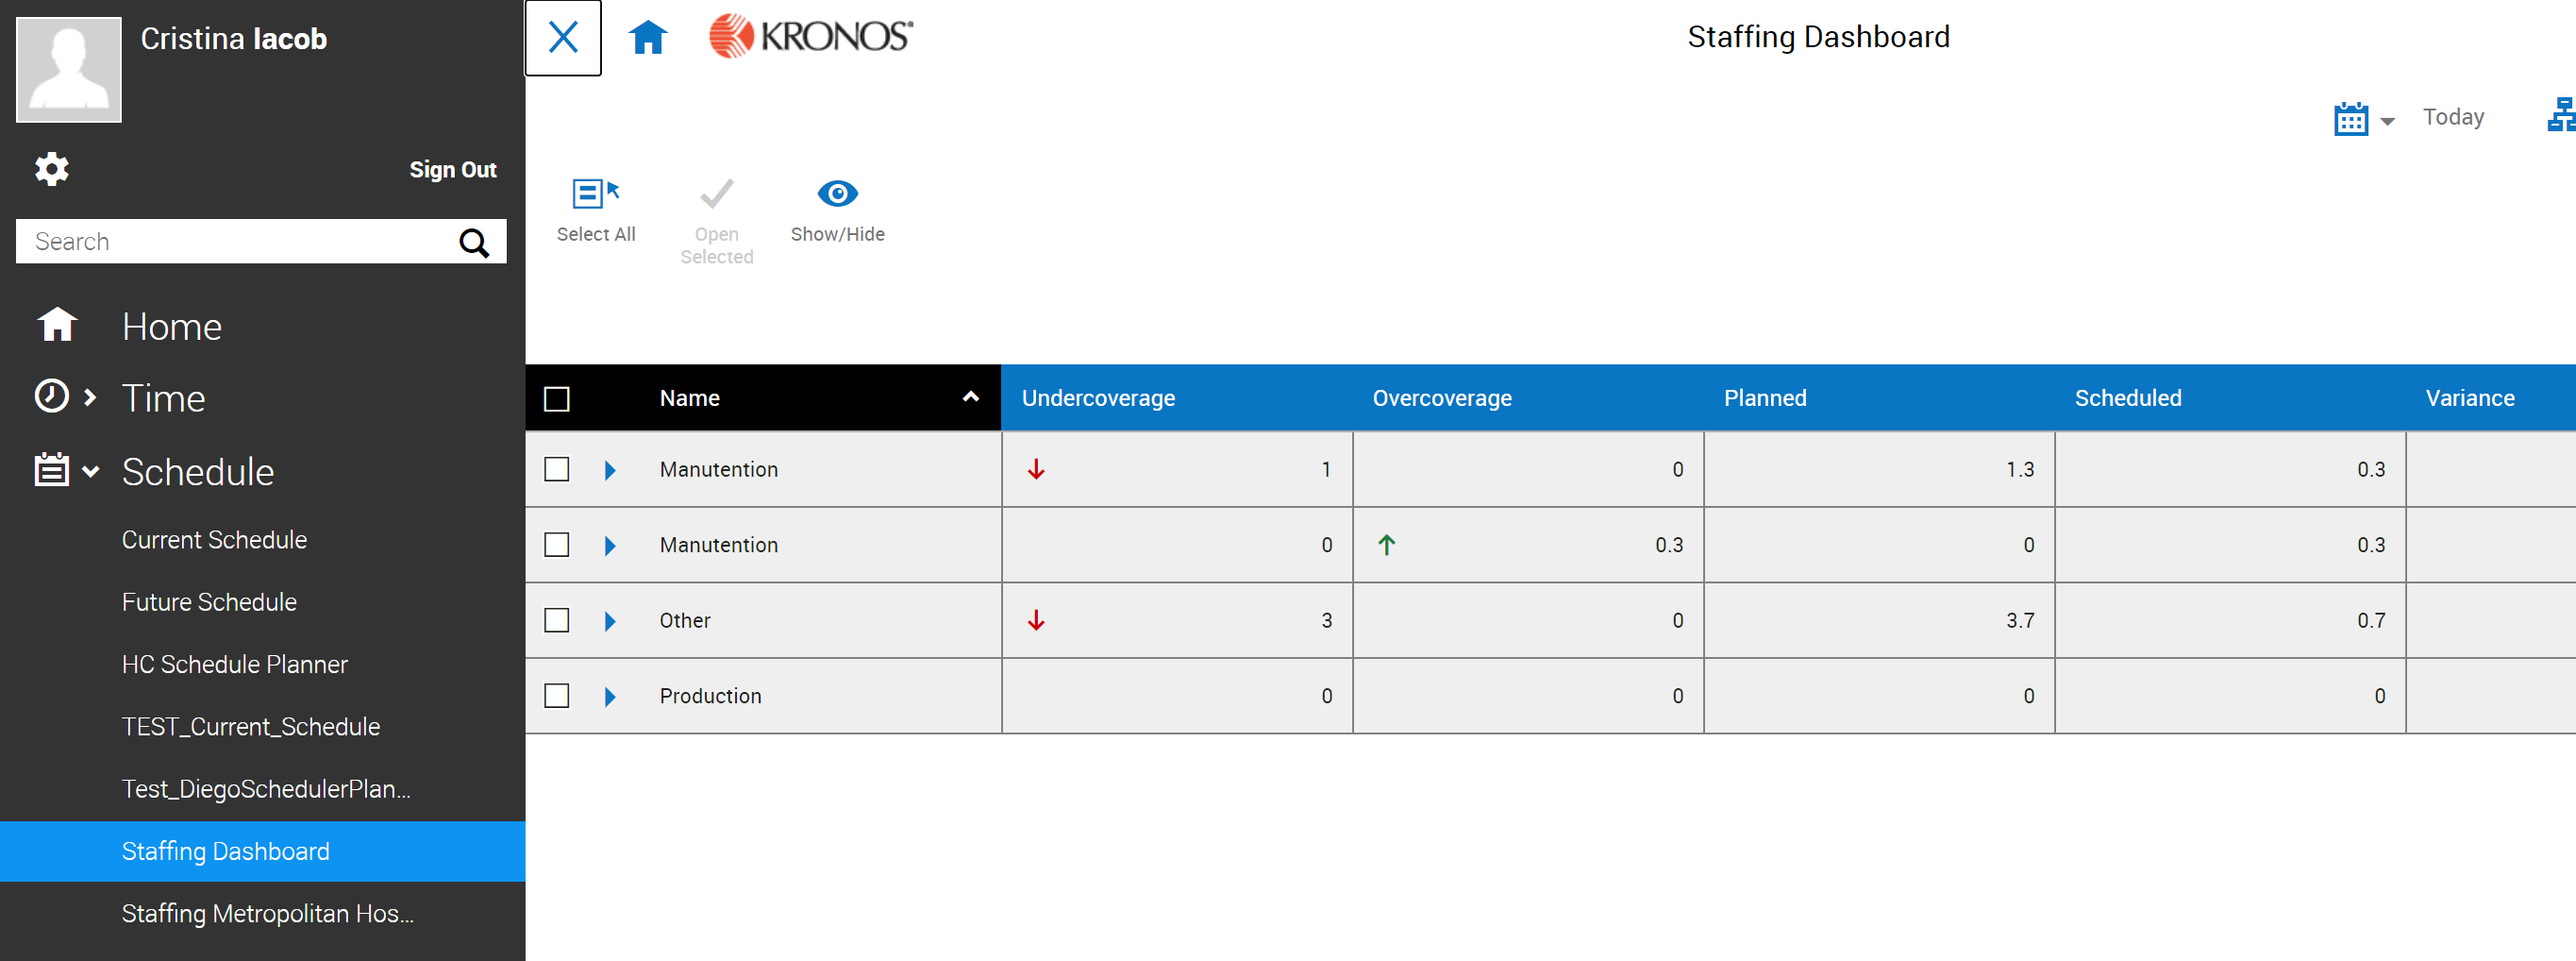
On this page you will be able to:
- Select the location type that you want to plan
- View the jobs attached to each location type
- Validate the coverage in Dataview
- Choose a particular location in the structure
- Choose a particular day
- Show/Hide Time Span as well as Jobs
Once you have selected the type of location you can click on the button  to access the planning screen.
On this page you will have access to the Quick Actions page. You will be able to:
|
|
Removing a shift |
|
|
Transferring an employee to another position |
 |
Add a shift model to an employee |
|
|
Add a comment |
|
|
Add a pay code |
 |
Delete a quarter |
|
|
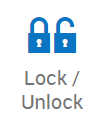
Locking and Unlocking |
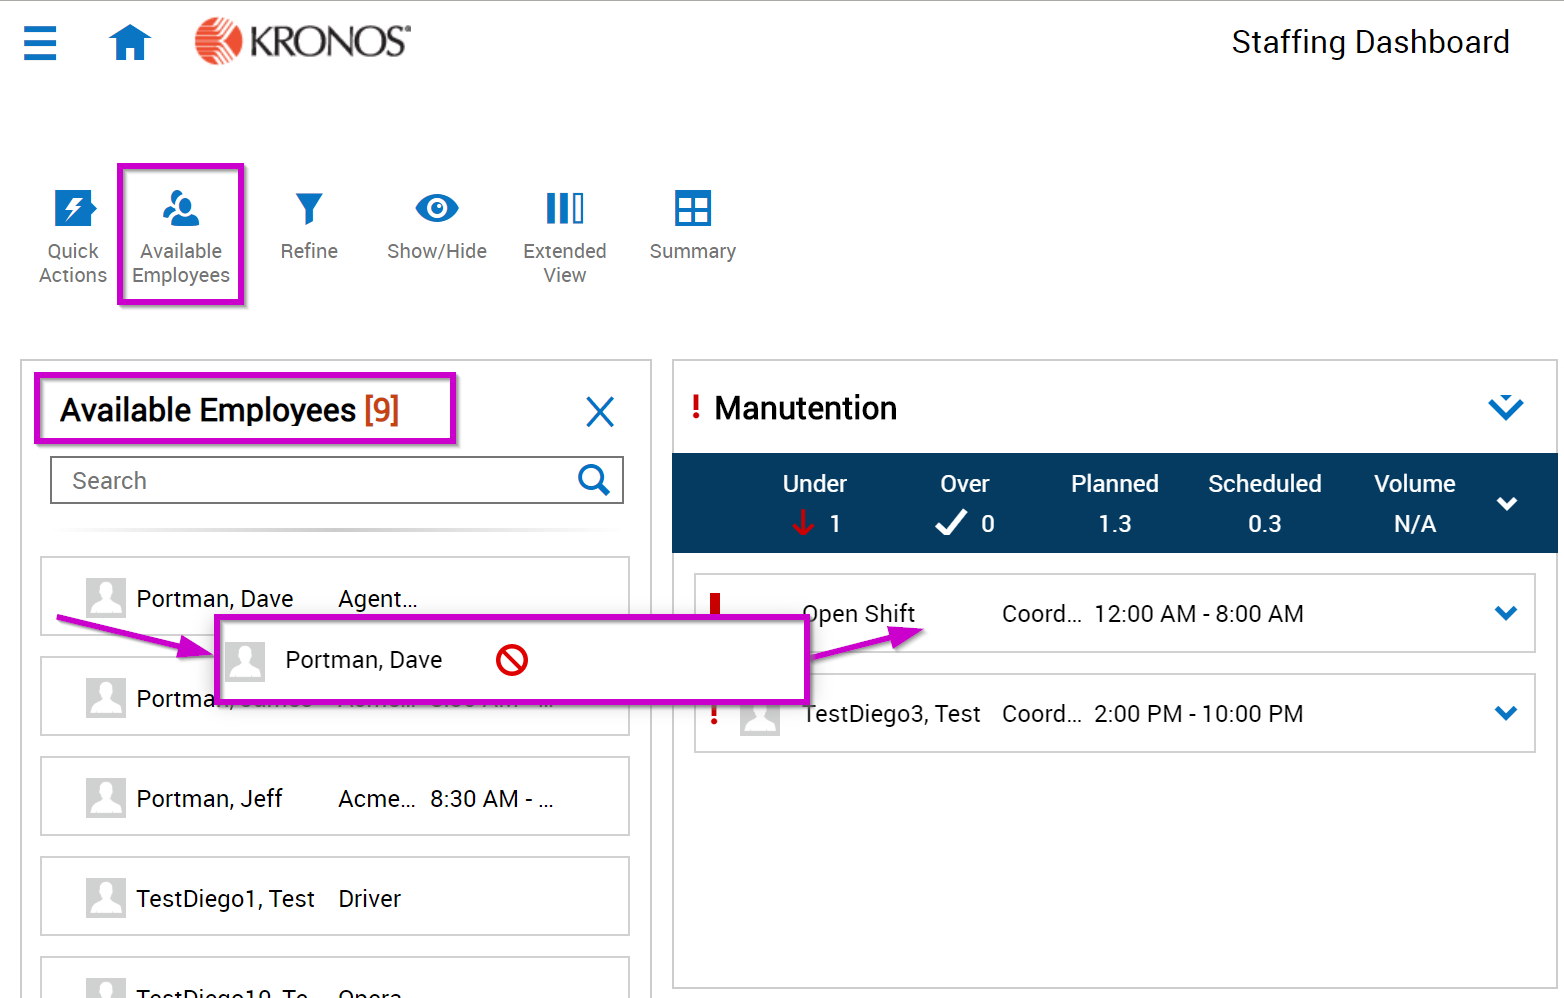
 The Available Employees button will allow you to view and search for all employees who have either the primary job or the job transfer set required to work in the selected location types. You will be able to drag and drop employees to open shifts to cover them.
You will be able to rearrange your locations types on the screen by dragging and dropping on the tiles.
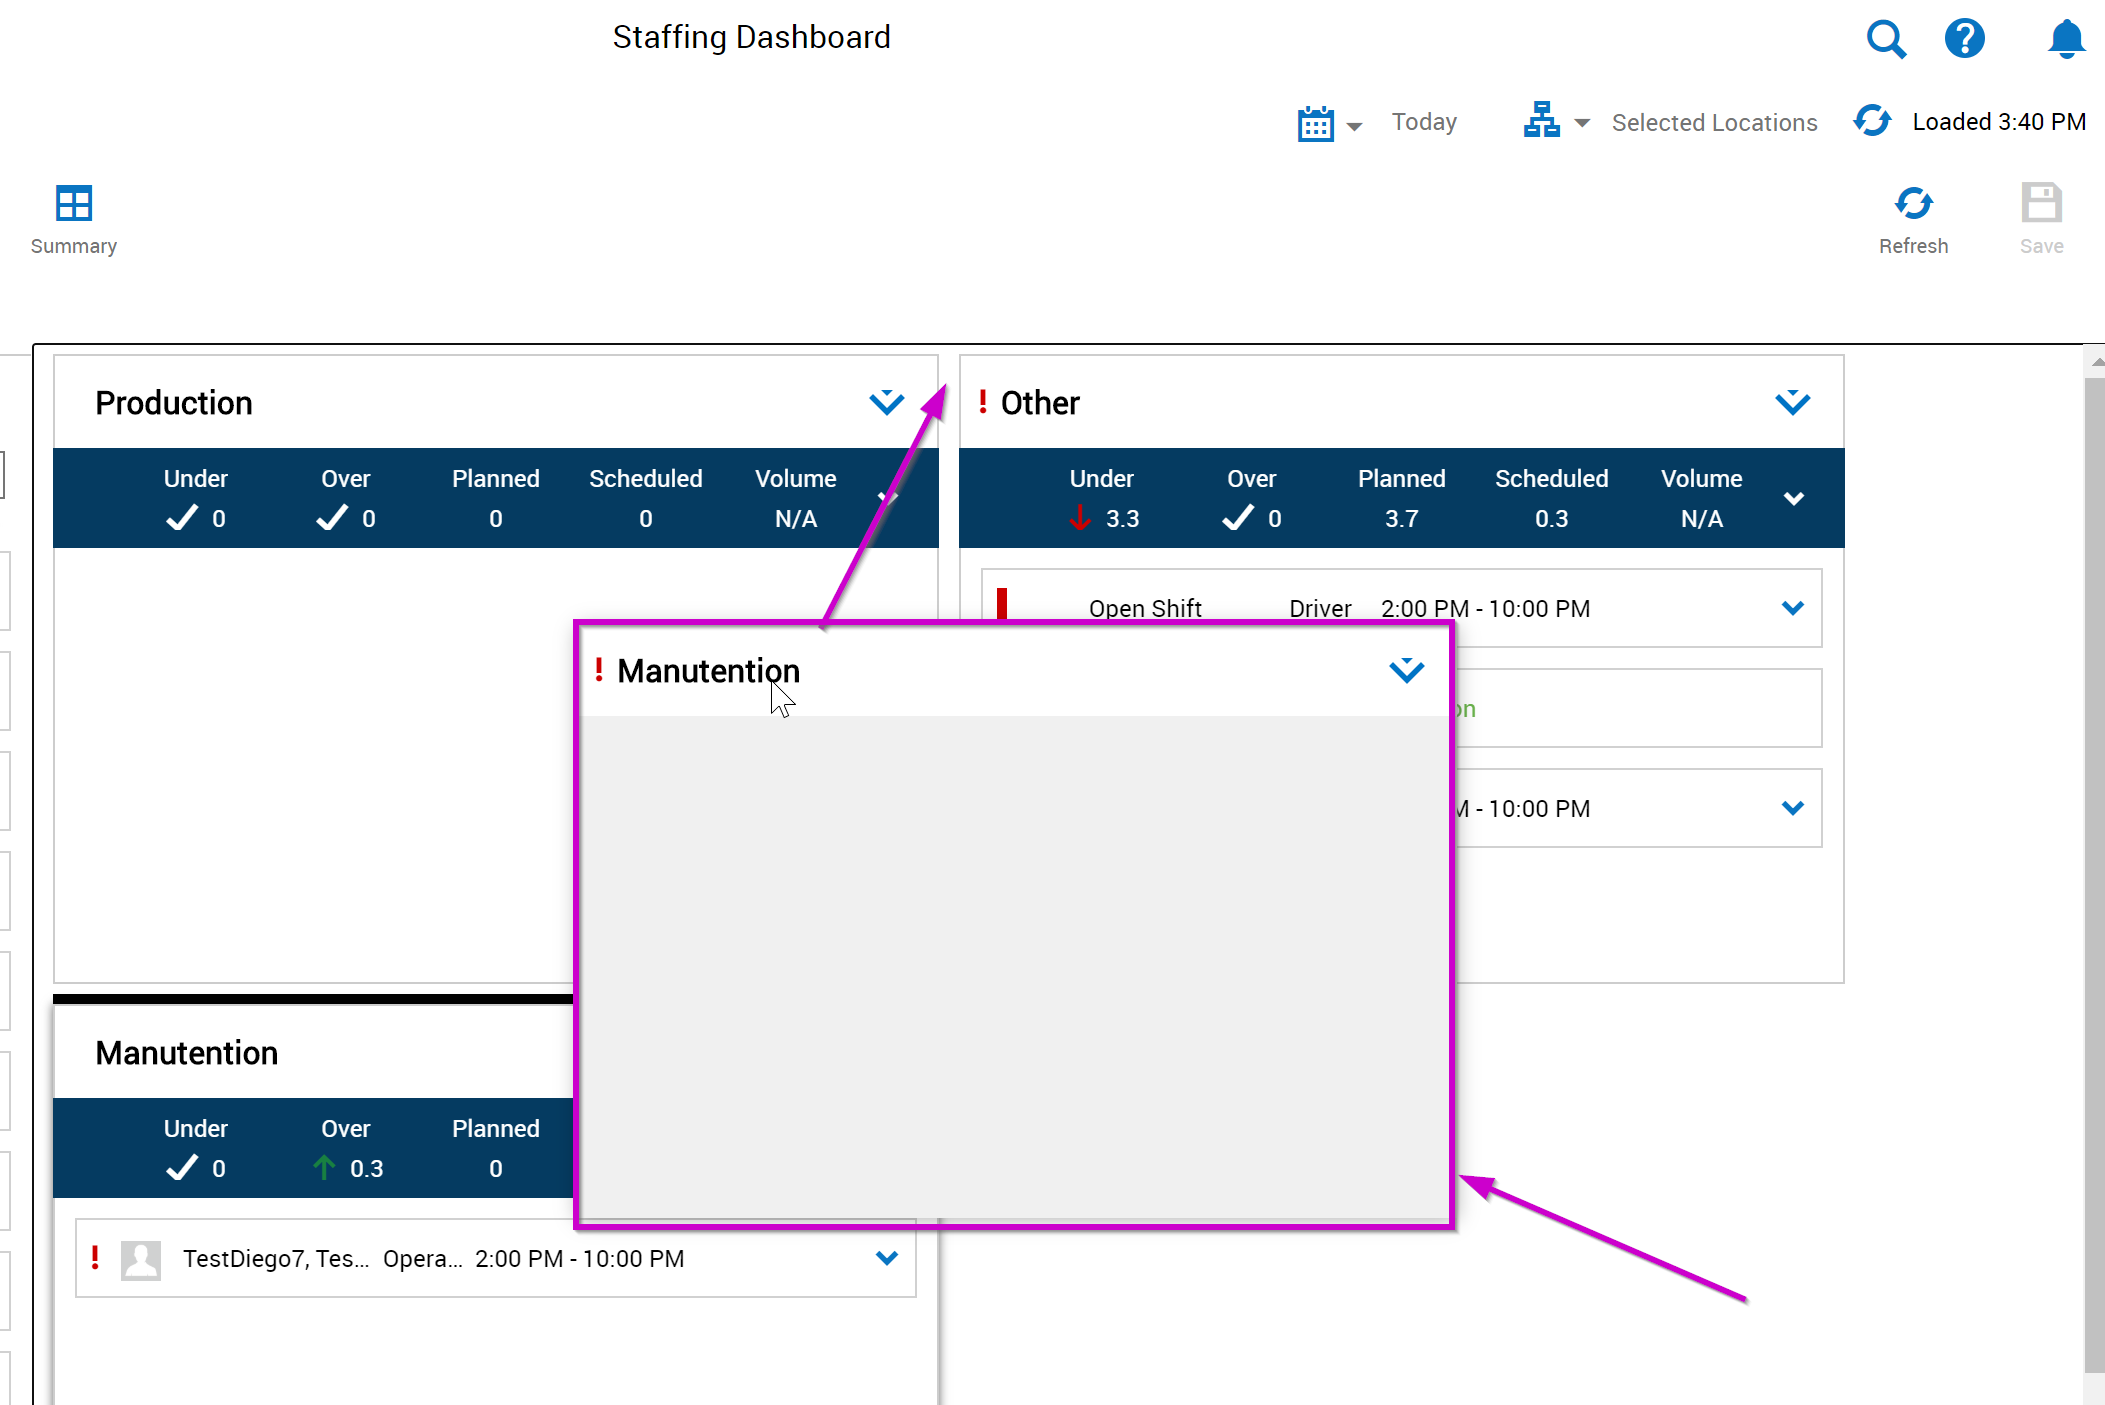
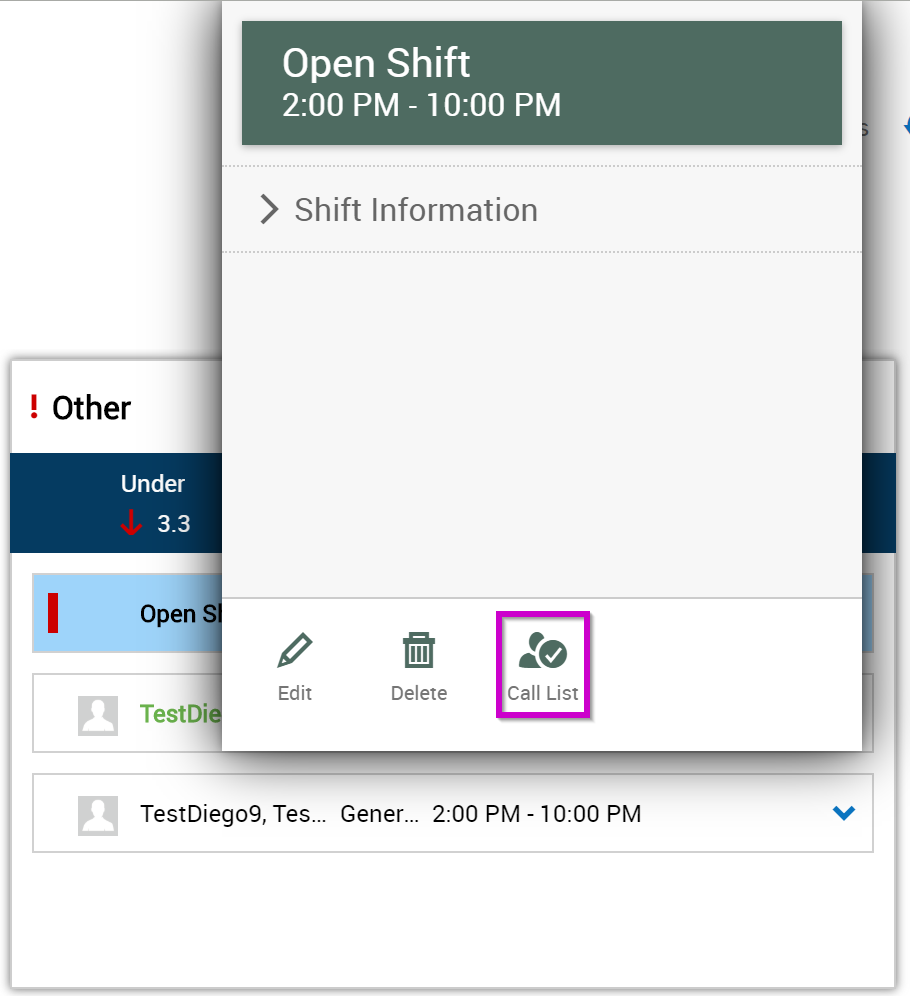
For each tile, you will be able to create open shifts and fill them manually or through the call lists configured in your organization.

For each tile, you will be able to consult the detail of the coverage workload.

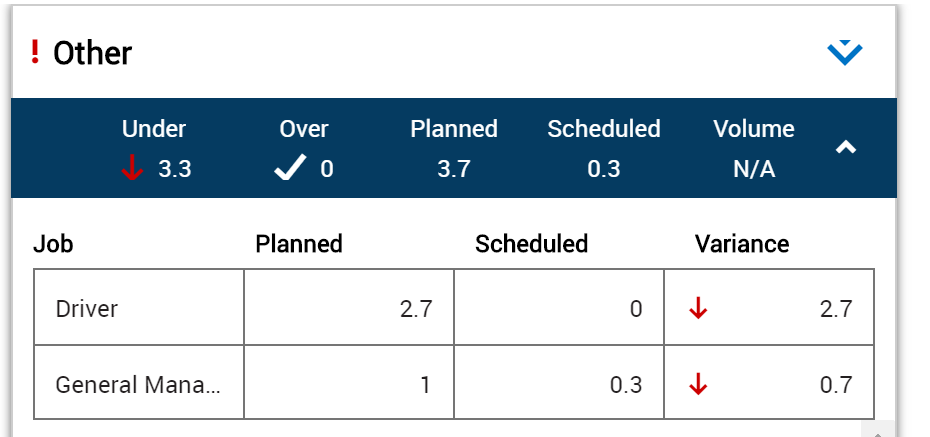
Red exclamation marks will be used as indicators for rule violations for both organizational and personal violations. You will be able to see the details by clicking on them.
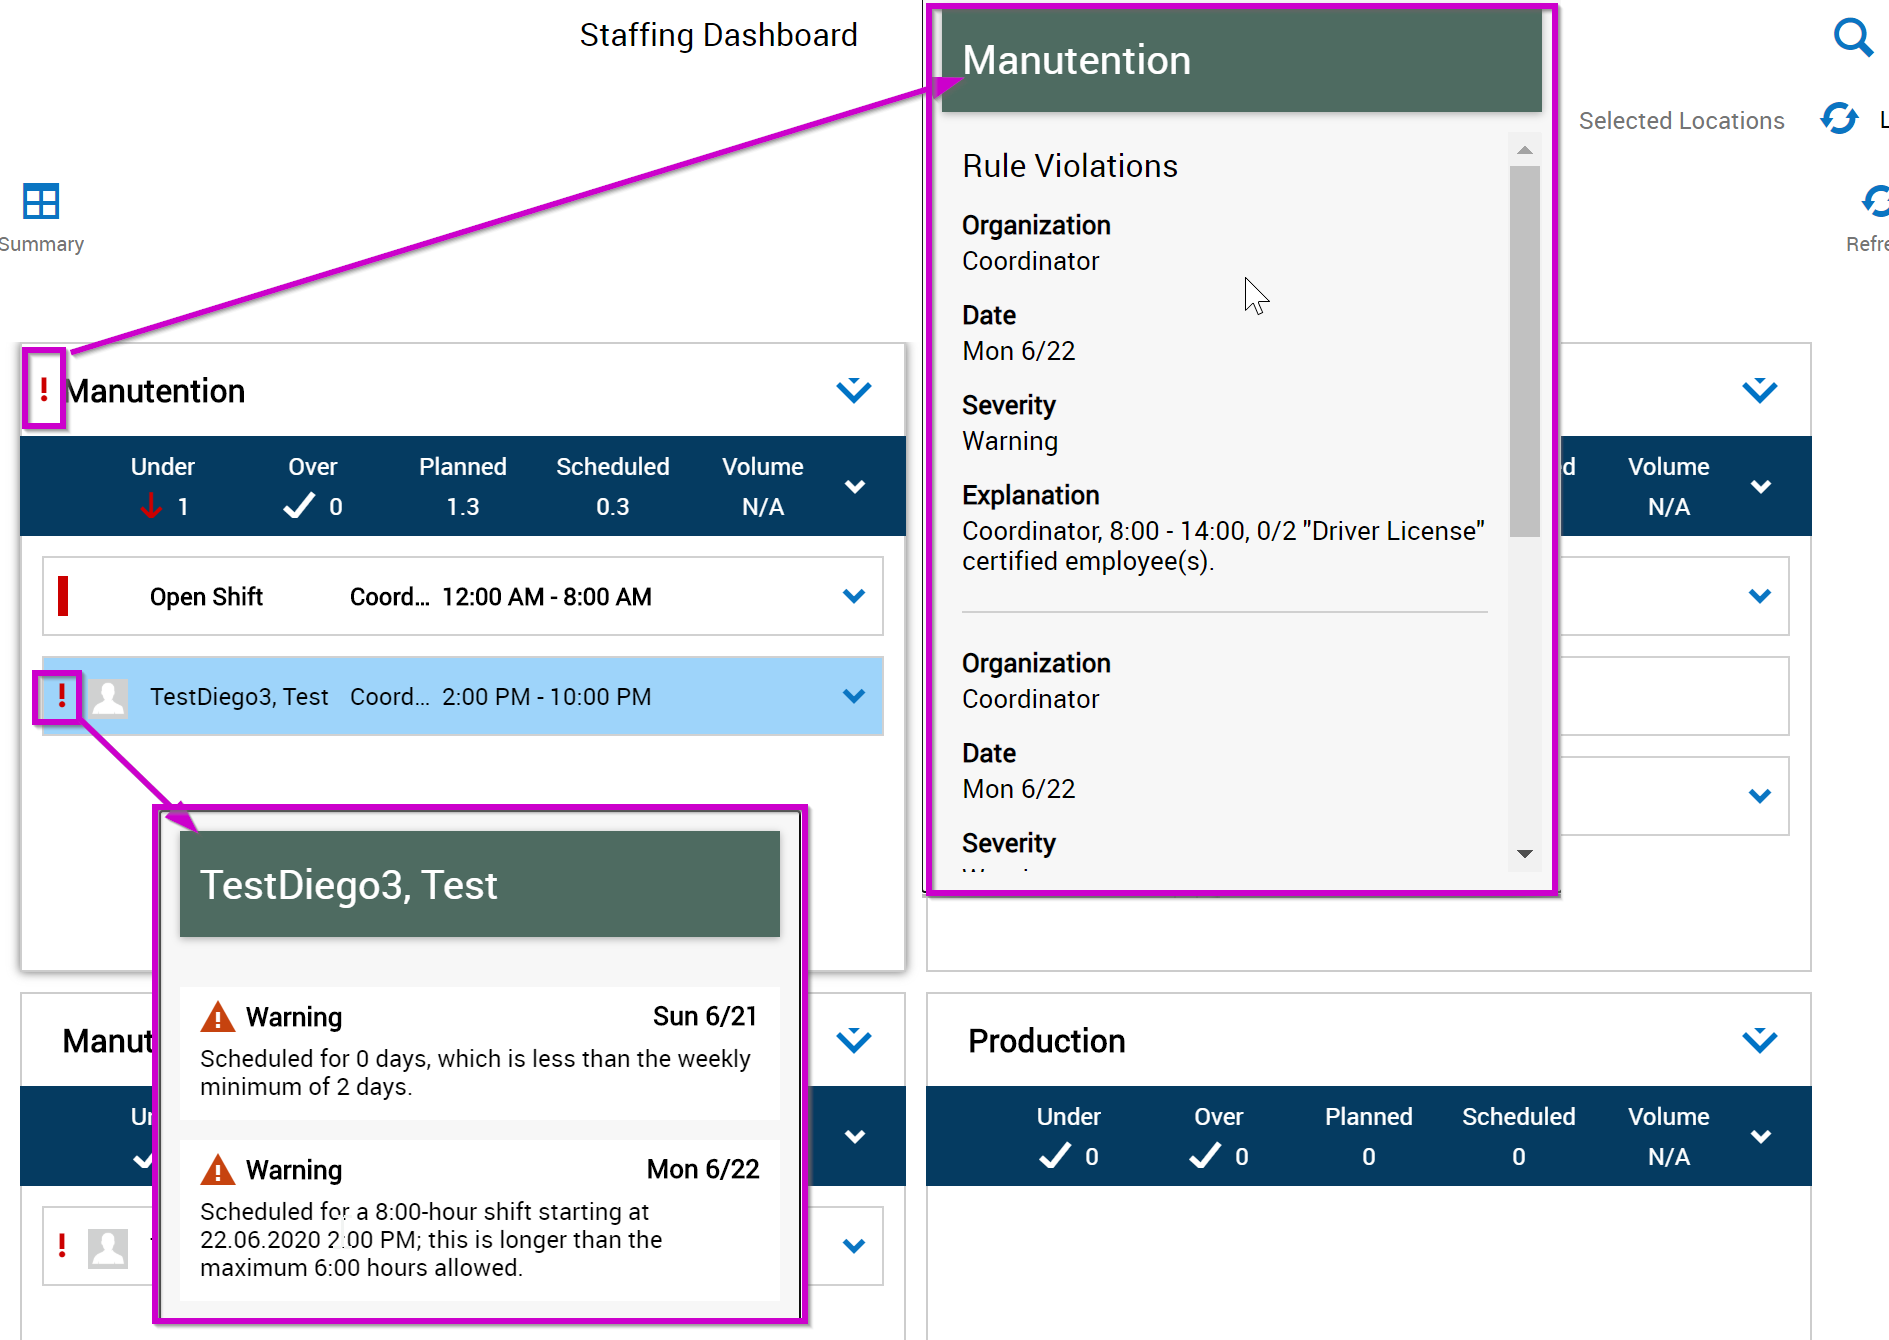
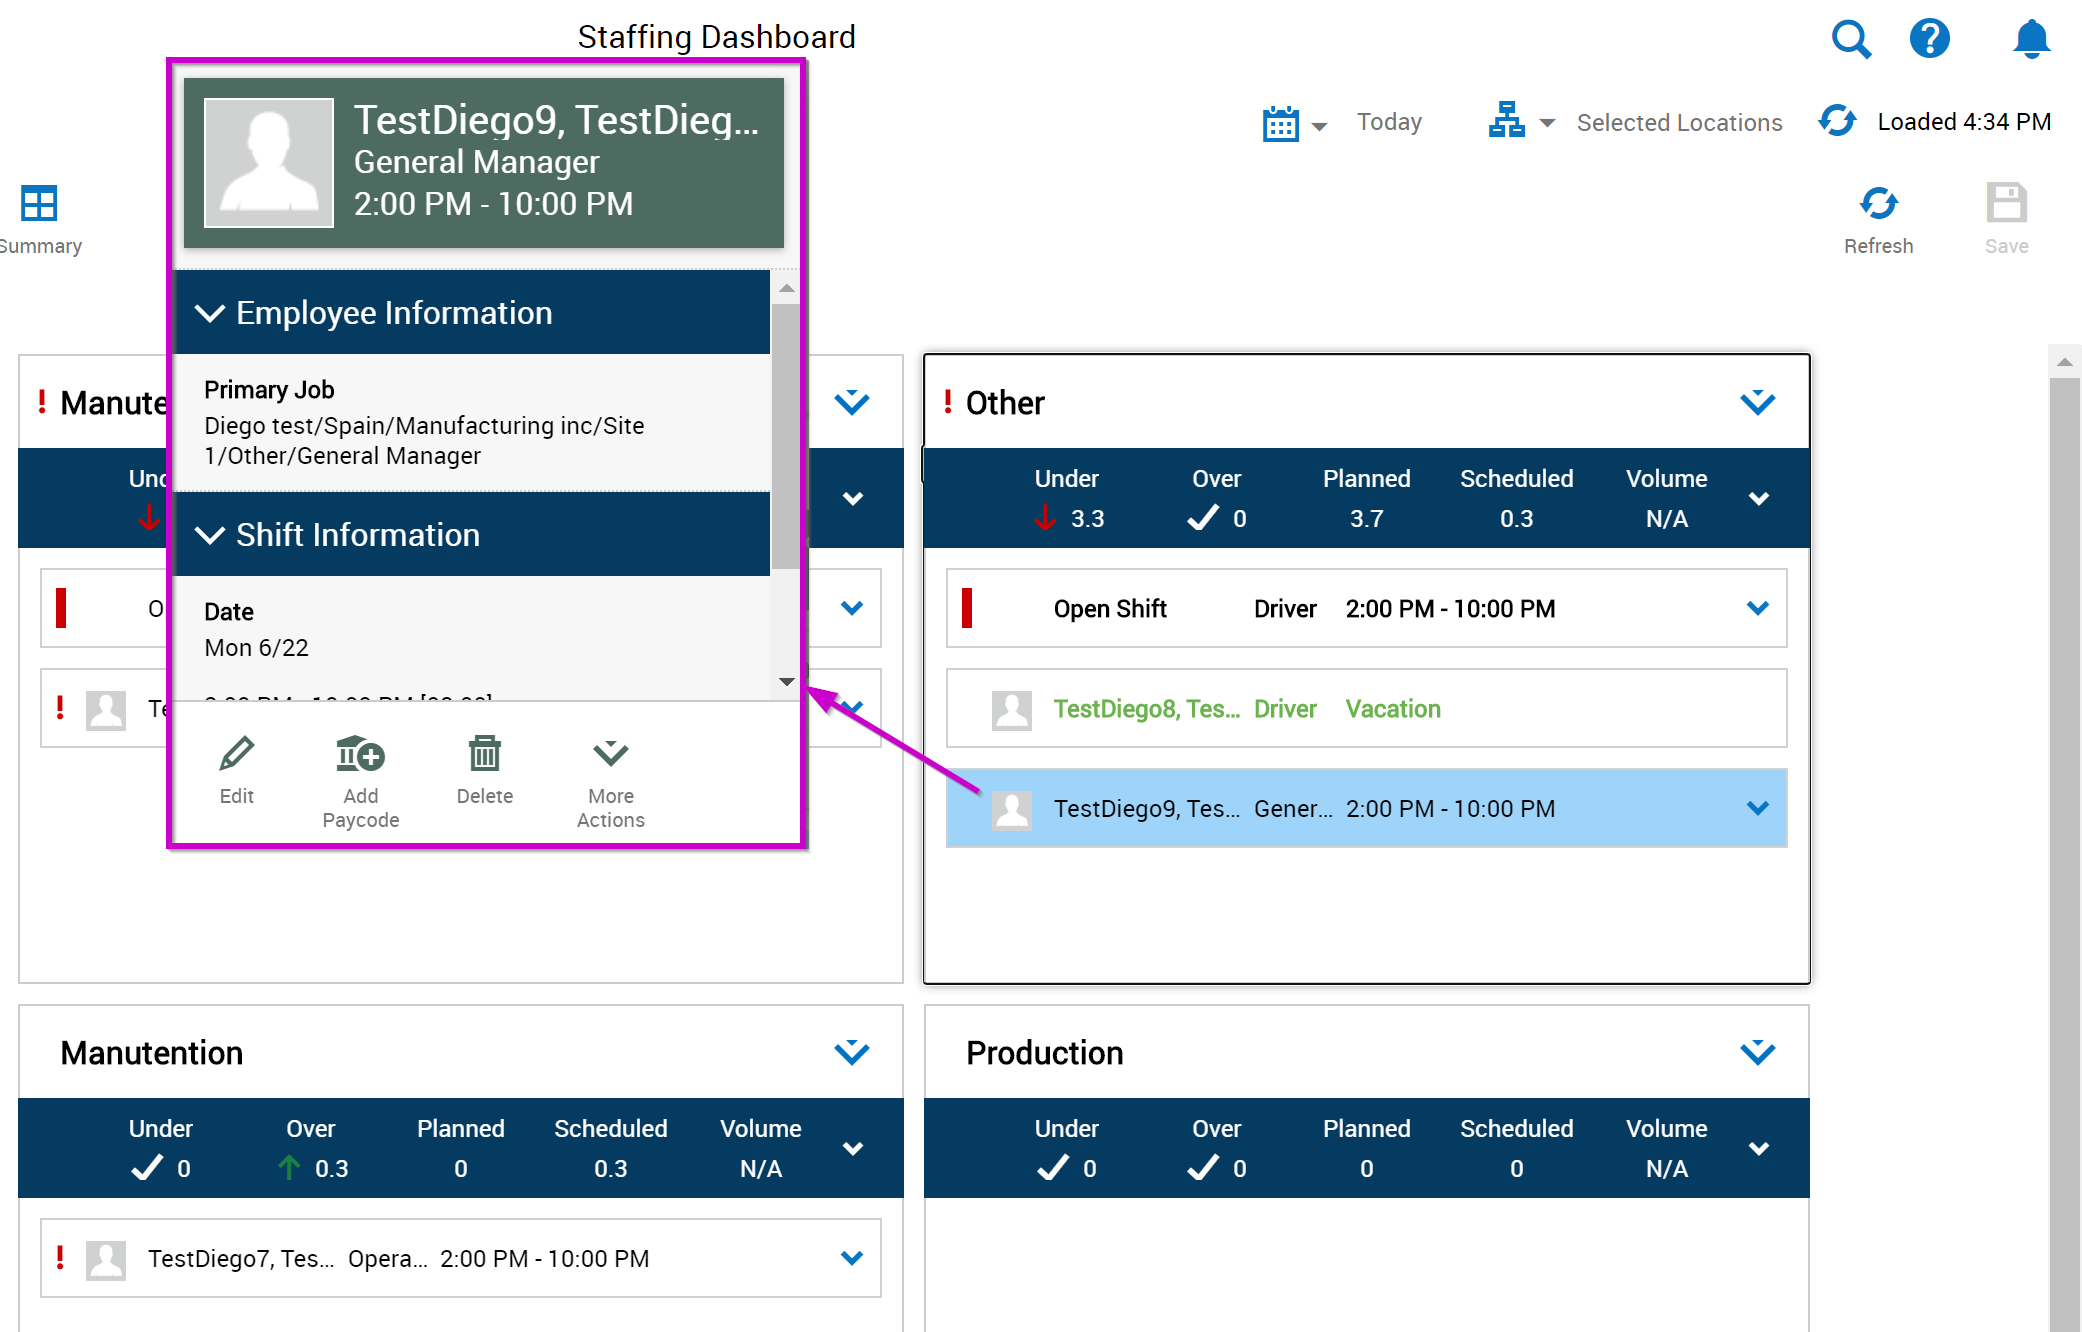
By right-clicking on an employee, you will be able to see details specific to the employee and the shift he or she occupies. In addition, you will be able to modify the shift by changing the start or end times and adding a transfer of business structure, work rule, cost center or labor category. You can also add a pay code that will appear in green in the tile and can generate an open shift if necessary.
When to try it out?
Kronos Staffing Dashboard is available since May 2020 for all customers who currently have access to Kronos Dimensions and who have the Advanced Scheduling module. I invite you to take a few minutes to configure the tool as described above and familiarize yourself with the many options that the Staffing Dashboard offers.
For more information or help, contact our dedicated Kronos team.
Cristina Iacob
Kronos Consultant